Let us know how Day 1 went if you used our class outline. Here is Day 2 for you. Please note that we don’t go over everything in the culinary terms. Just pick and choose what you’ll be using on a daily basis. Please read through before you begin. There are notes with teaching tips.
Day 2
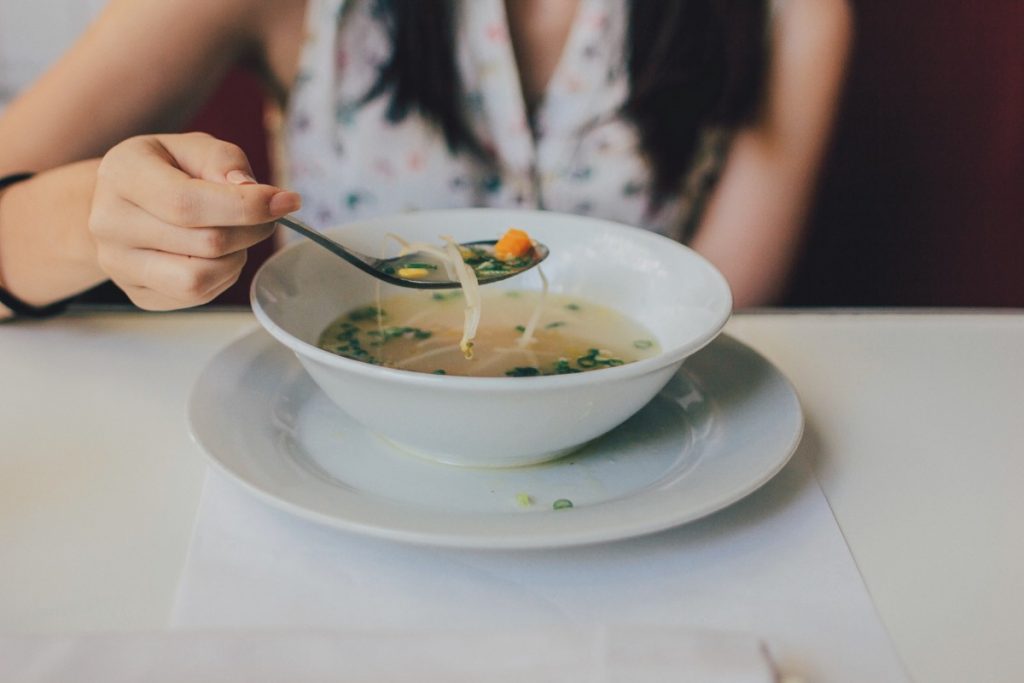
Smoothies for Breakfast/Lunch! We’ll use fruit and veggies and spread our creative wings!
We will use many of these terms.
Cooking Techniques and Terms
You need to understand some kitchen lingo or terminology. If a recipe says to sauté and you braise, you will have an entirely different finished product.
Kitchen Terminology
~A~
Acidulated water: This is when water has lemon juice or vinegar in it that prevents certain foods from becoming brown such as apples, artichokes, celery root, Jerusalem artichokes, etc.
Al dente: Cooked just enough to retain a somewhat firm texture. It Italian it means, ‘To the tooth.’
A La Carte: French meaning – “According to the menu,” off the card.
A La Mode: Pie with ice cream on it.
Au Beurre: This means that the vegetables, fish, meats or whatever it may be, has been cooked in butter, or glazed with butter.
Au Gratin: To cover a prepared dish with breadcrumbs or cheese (or both) and brown to a golden color in the oven or under the broiler.
Au Jus: (French) Served with natural juices
~B~
Bain-Marie: A dish containing ingredients is placed in another of warm water in the oven, so the food is kept moist and does not become dry or overheated. Make sure oven temperature is correct and that the outer dish does not contain too much water, otherwise, it will bubble over into your ingredients.
Bake: To cook or dry heat in an oven and this applies to all ovens cooked foods except meats which when baked, are usually known as roasts.
Barbecue: To roast slowly on a spit or rack over heat, usually basting with a highly seasoned sauce or marinade.
Bard: To wrap meat with bacon or salt pork.
Baste: To moisten meat or other food while cooking, in order to add flavor and prevent drying of the surface. Melted fat, meat drippings, lard, fat, water or sauces, can be used for basting.
Beat or Beating: To lift a mixture rapidly up and over with a fork, spoon, wire whisk, rotary or electric beater, for the purpose of introducing air or making the mixture smooth, stiff in the case of egg whites, or fluid in an omelet mix.
Binding: Adding liquid, egg or melted fat to a dry mixture to hold it together.
Blanch: To dip in boiling water for a few minutes to loosen skins, or whiten foods, or to partly cook in hot oil or fat; e.g. blanching potato skins before frying. When blanching items in boiling water leave for only a few minutes, then remove and refresh under cold water for maximum crispness of color.
Blending: Means beating OR combine ingredients with a fork, spoon or spatula.
Boil: To cook in water or other liquid, in which the bubbles are breaking rapidly on the surface and steam is given off. (The boiling point of water is 212ºF or 100°C)
Bouquet Garni: A bunch of herbs consisting of parsley, thyme, bay leaf, and celery tied together or inserted into a cheesecloth, or paper- bag.
Braise: To cook by shallow frying followed by baking or stewing. The food is first browned in hot fat or oil, then slowly baked or simmered in a covered pan or baking dish, sometimes with a small amount of fluid added.
Broil: To cook by direct heat. This may be done by placing the food under or over an open flame or heating unit.
Browning: Searing the outer surface of meat to seal in the juices.
Bruise: Release the flavor of foods, especially herbs and spices, by crushing them.
Brush With: To lightly apply melted fat, cream, etc., with a pastry brush on food.
~C~
Caramelize: To melt sugar slowly over a very low heat, until sugar is liquid and brown for the purpose of flavoring and coloring other food. Or to caramelize onions, meaning to brown slowly.
Chevre: This is the term given to French goat’s cheeses.
Chop: To cut into small pieces with a sharp knife or a chopper.
Clarify: To make clear or transparent and free from impurities. Clarified butter, as an example.
Coat: To cover the surface of one food evenly with another.
Coddle: To cook or simmer an item just below the boiling point for a short period of time. Eggs are frequently coddled.
Cream: To soften or beat one or more foods until soft and creamy. This term is usually applied to the mixing of butter and sugar.
Crepe: (French) Thin pancakes
Croquettes: Finely chopped foods usually combined with potatoes or a thick sauce and molded into cylinder shapes, coated with egg and milk and fried in oil till golden in color.
Croutons: Usually small cubes of bread fried in oil and/or butter, or baked, until a golden color. Served in salads and as a garnish for soups.
Cube: To cut any food item into square pieces of many sizes.
Cut-in: To combine a solid fat with dry ingredients, by a horizontal motion with knives or pastry blender.
~D~
Deglaze: A process of adding liquid to a hot pan in order to collect the bits of food, which stick to the pan during cooking. This is most common with sautéed and roasted foods. Wine, stock, and vinegar are common deglazing liquids.
Dice: To cut into small square pieces. There are four sizes of dice.
Dock: To pierce pastry dough before baking to allow steam to escape and prevent blistering of the dough.
Dot: To scatter small pieces of fat, such as butter, on top of foods to be cooked. Pies are commonly dotted with butter before the top crust is put on.
Drain: Remove extra fat or liquid from cooked food or raw vegetables.
Dredge: To sprinkle or coat a food evenly, with a thin coating of dry ingredients such as flour, so that it is completely covered.
Drawn butter: Melted butter.
Dust: To sprinkle with flour or powdered sugar.
~E~
Emulsify: To completely blend together oil with an acid such as vinegar or lemon juice. This term is usually used while making salad dressings.
~F~
Fillet: A boneless, lean piece of fish or meat.
Flake: To break or pull apart gently into natural segments, e.g., to flake cooked fish.
Fold: To add ingredients, such as whipped cream, beaten egg whites or sugar, with a gentle cutting or folding motion (rather than beating), to preserve air bubbles.
Fricassee: Pieces of poultry or meat stewed in a liquid and served in a sauce made from the same liquid.
Fry: To cook in hot fat or oil
(a) To sauté or pan fry, food is cooked in a small amount of fat or oil on top of a stove.
(b) To deep fry, food is partially or totally immersed in fat or oil.
~G~
Garnish: To decorate a dish with an item that will improve its appearance and quite often, add to its flavor too.
Glaze: A shiny coating, consisting of a mixture of water or sugar and fat, egg white etc., applied to certain foods such as pastry, fruit, bread, rolls and baked ham.
Grate: To rub on a grater (a utensil with a rough surface) and produce fine particles.
Gravy:
Juice exuded by roasted meat or poultry, made into a roux, then liquid added slowly to it.
Grease: To rub with butter, oil, etc.
Griddle: Flat metal plate used to bake breads and pancakes on the top of the stove.
Grilling: Cooking directly under a flame in an oven or on a grate over hot coals.
Grinding: Grinding meats or other foods into smaller pieces to use in sausages and for other uses.
~H~
Hor d’oeuvre: Petite appetizers or relishes.
~J~
Julienne: To cut into matchstick shapes about 1/8 inch across by 2 inches long.
~K~
Knead: To fold and press dough firmly with the heel of the hand, turning between folding. Usually done to bread and yeast dough’s.
Kosher (meat): Meat sold within 48 hours after being butchered in accordance to Hebrew religious laws. The style of Jewish dietary cooking.
~L~
Larding: Salt pork strips inserted into meat with a special needle. Used to add flavor and moisture to meat.
Leek: Small onion like plant, used as an aromatic seasoning or vegetable.
Legumes: (French) Dried beans, peas, lentils and such.
Lentil: A brown or yellow flat seed resembling a pea used for soups, garnishes, and as a vegetable.
Lukewarm: A mild, tepid temperature of approximately 95 degree F.
~M~
Make a Well: While kneading the dough make a heap of the dry ingredients by creating hollow space in the center to pour the liquid. Work it in a round motion, taking in the flour, little by little, till all of it is blended.
Mash: Pound the food and crush it into pulp.
Melting: Heat the ingredients till they are changed from solid to liquid.
Marinate: To soak a food in a liquid, usually an oil or acid mixture containing spices, seasonings, vegetables and aromatic herbs, for a certain length of time to enhance the flavor and act as a tenderizer
Mince: To cut very finely, to obtain smaller pieces than those produced by chopping.
Mise en Place: A French term meaning, ‘everything in its place’ or ‘putting in place’.
Moisten: To add or sprinkle with liquid in order to dampen.
~O~
Omelet or Omelette: Seasoned eggs those are beaten and sautéed. The eggs will puff up at which time they are rolled or folded over. Often times, cheese and other ingredients are inside the omelette.
~P~
Pan-broil: To cook uncovered in a hot frying pan. The fat is removed as it accumulates. Liquid is never added.
Pan Fry: Fry with very little fat in the pan.
Paste: This is the term used by most cheese makers to describe the inside part of the cheese.
Par-boil: To partially cook a food by boiling, the cooking being completed by another method. Potatoes par-boiled before frying or roasting makes for fluffy light inner and crisp outer.
Pare: Removing the outside skin or peels of vegetables or fruits.
Pat (as in: pat of butter): Portion of ingredient shaped into a small, flat, usually square shape. Approximately 1 Tablespoon.
Peel: To strip off the outer covering, as with oranges or bananas.
Pickling: Is where vegetables like cucumbers are “pickled” in sugar, vinegar and spices for a day or two before eating.
Pinch: Just that–the tiny amount of seasoning that can be held between your thumb and forefinger; an immeasurably small amount.
Pitted / Seed: To remove seeds from fruit or vegetable.
Poach: To cook foods such as eggs or fish just below boiling point in water, milk or stock, similar to simmering but usually for a short time only.
Puree: This is when you puree your ingredient, usually vegetables or beans. Often soups are pureed or you can puree beans to use as a thickener of a soup or sauce. You can use a food processor, food mill, immersion blender, or potato masher to puree.
~Q~
Quiche: A pie made of custard and cheese.
~R~
Reducing: This procedure is used to intensify a flavor. As an example, you can place carrot juice in a pan and simmer it, uncovered, so the liquid evaporates and the flavor intensifies. I will give you examples throughout the book of reductions.
Reduce: To thicken and intensify the flavor of a liquid by evaporating it through boiling.
Render: Cook fatty meats, such as bacon, until the fat melts.
Rest: A term mostly used for dough or batters that need fermentation. That means when the dough needs to be set it is kept aside for a certain period of time.
Roasting: To cook food uncovered in a hot oven. It is often done in large ovens over a high temperature. This method is more commonly used in restaurants rather than regular households.
Roux: Equal parts of flour and fat cooked together and used to thicken fluids when preparing sauces, soups and gravies. The measurement is 2oz fat, 2oz flour to 1 pint of liquid.
Rub: in Add fat to flour and rub them together to mix.
~S~
Sauté: To cook in a small amount of fat or oil on top of a stove.
Scald: To heat a liquid, usually milk, to a point just below boiling, about 185 degrees. Minute bubbles appear around the edge of the vessel.
Scallop: To bake food, usually cut into slices in a liquid or sauce, such as scalloped potatoes. The food is usually covered by a liquid, sliced onion when baking potatoes, a little oil or butter and seasoning.
Score: To make lengthwise and crosswise cuts across the surface with a sharp knife.
Sear: Cook at very high heat for a little while. Scorch.
Season: To add salt, pepper, herbs, spices etc. to improve the flavor of a dish.
Seasonings: Dry herbs and spices used to enhance the taste and appearance of food.
Shred: To cut or tear into thin strips or pieces.
Sift: To put dry ingredients through a sifter or sieve.
Simmer: To cook in a liquid, in which bubbles form slowly and break just below the surface. The temperature usually ranges from 110ºF-130ºF (55° to 60°C).
Skewer: Metal or wooden pin used to hold meat, poultry or fish in shape during cooking.
Skin: As in tomatoes; to peel the tomato skin by immersing them for two minutes in boiled water.
Smoking: Glowing charcoal is placed in a small katori, or bowl, cooked meats are placed around this. Dry spices and ghee are poured on top of the coals and a lid is quickly placed over the meat. This smoking adds a delicate flavor to the prepared meats.
Soak: This means to put food in liquid.
Soften: Allow cold butter to remain at room temperature until soft and easily blended.
Squeezing: Drain out the liquid from the food by crushing.
Steam: To cook over or surrounded by steam.
Steep: Soak in a liquid at a temperature just under the boiling point to soften or extract a flavor
Stew: To simmer in a small amount of liquid with or without a lid.
Stir-frying: This is quick cooking over high heat in a small amount of oil, tossing and turning the food during the cooking. With this method, meats stay juicy and tender and vegetables come out slightly crisp with all their vitamins intact.
Straining: Separating liquids from solids by passing them through a sieve or through muslin.
Syrup: A thick sweet liquid made by boiling sugar with water or fruit juice.
~T~
Tempura: A form of deep frying from Japan, to lightly coat food items with an egg, flour and ice-water batter, then deep fry and serve with dipping sauce.
Tear: Break into pieces, using your fingers.
Tenderize: Lay meat out on level surface and continuously pound with flat, spiked utensil.
Toast: Lightly brown food in oven or toaster.
Toss: Tumble ingredients lightly with two utensils using a lifting, fluffing motion.
Torte: A rich sponge cake, often multi-layered and filled with whipped cream, jam, chocolate or fruit.
~V~
Vegan: A person who does not eat meat or any animal products, including bacon, cream, eggs, milk and honey.
Vegetarian: A person who does not eat meat or poultry and fish but may eat cheese, milk and eggs in their diet.
~W~
Water Bath: One bowl of ingredients placed inside a baking dish filled with hot water in order to cook food with gentle heat.
Whipping: Beating an ingredient until frothy and thick.
Whisking: Means to incorporate air, usually in eggs.
~Z~
Zest: The colored outer rind of citrus fruits.
_____________________________________________________
We’ll make this Marinara Sauce next and let it simmer while we make our Sandwiches and Brownies!
Marinara Sauce
Just toss with cooked spaghetti or fettuccini noodles and a salad and you’re set. Always a favorite!
Serves 6
2 tablespoons olive oil
1/2 medium onion, diced
4 cloves garlic, peeled and chopped
1/4 cup carrots, grated
1/4 cup celery, sliced
1/3 cup zucchini, sliced
3 1/2 cups crushed tomatoes, 1 28-ounce can
1 teaspoon fresh thyme
2 tablespoons fresh basil, chopped
2 tablespoons parsley, chopped
3 medium Roma tomatoes, chopped
1 1/2 teaspoons sea salt, or to taste
1 teaspoon pepper
Heat oil in a large saucepan over medium heat. Add onion, garlic, carrots, celery and zucchini. Cook until softened, about 5 minutes. Add the canned tomatoes and their juices, bring to a boll, then turn the heat down and simmer covered, for about 10 minutes. Add the herbs, fresh tomatoes and salt and pepper. Simmer for another 5 minutes.
Variations
You may add some red wine to the sauce if you like, about 1/3 cup, when you add the canned tomatoes.
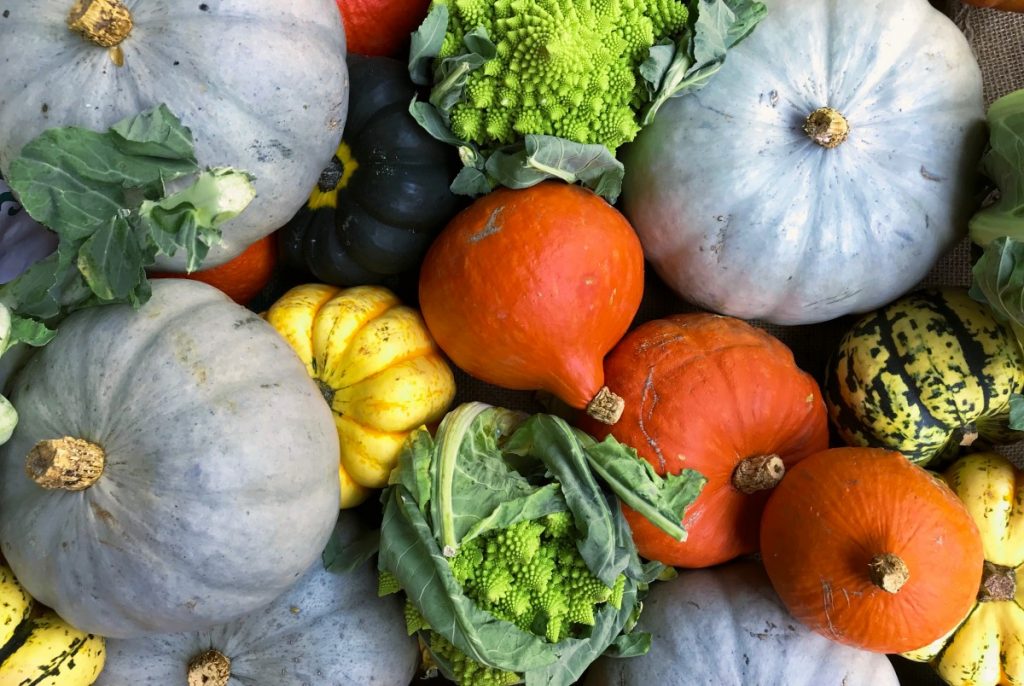
Variations for eating seasonally:
Spring: Peas, asparagus, green garlic
Summer; All fresh tomatoes, eggplant, red peppers, corn,
Autumn: All fresh tomatoes, Jerusalem artichokes,
Winter: Cubed winter squash, parsnips, turnips
___________________________________________
Here are some wonderful ideas to make creative sandwiches. We’ll have lots of great ingredients for you to create a healthy and delicious sandwich!
Sandwiches:
Sometimes the spread can really perk up your sandwich. Try the Chipotle Dressing on the Mexican Wrap, Garlic Herb Aioli on the Peasant Loaf, or spread your High Tea sandwich with Maitre d’ Butter. Sometimes it’s all about inspiration.
Peasant Loaf
Cut crusty French or Italian bread in half lengthwise, brush with olive oil or butter, fill with thin slices of Gruyere cheese, fresh thyme leaves, mixed salad greens, thinly sliced tomatoes and red onions, sea salt and freshly-ground black pepper to taste.
High Tea Sandwiches: Have a tea party!
Use thinly sliced bread of your choosing, spread with butter or mayonnaise (regular or vegan-type) and fill with thinly sliced radishes, thinly sliced English cucumber, chopped scallions, watercress, and fresh or dried dill.
Tuscan Grill
Fill wholegrain bread, rolls or pizza dough with leftover grilled vegetables–bell peppers, eggplant, zucchini or summer squash, tomatoes, onions. Use season-appropriate vegetables. Drizzle with olive oil and fresh herbs. Ratatouille will work if you have leftovers.
Asian Inspired
Sauté onion, celery, garlic, ginger, and Asian greens (Chinese cabbage, bok choy, etc) in a little sesame oil and soy sauce until tender. Spread a piece of pita bread or a wrap lightly with peanut butter and stuff or roll with veggie mixture.
Chapati
Spread one half of a chapati or other soft bread, flatbread, or pita with egg salad made with diced green or red onions, radishes and curry powder to taste. Add lettuce or spinach and fold in half to serve.
Middle Eastern
Spread halved whole-grain bagels with cream cheese and hummus or baba ganoush, thinly sliced cucumbers, chopped lettuce and tomato, and toasted sesame seeds.
The Herbal Power House
Place the following on a whole-grain roll — mayonnaise, sliced Monterey Jack cheese, alfalfa sprouts, sliced tomato, grated carrots, and a sprinkling of parsley, sage, rosemary, thyme, basil, and oregano.
Mexican Wrap
Mix leftover cooked beans, shredded cheddar or Monterey Jack, chopped jalapeno chilies, chopped fresh tomatoes, grated jicama, salsa, sour cream, and chopped fresh cilantro in a wrap.
Portobello Sandwich
Slice leftover grilled or pan-fried Portobello caps, toss with barbecue sauce, aioli or pesto mixed with a little mayonnaise, and add to your favorite bread (focaccia cut horizontally is nice) with as many seasonal veggies as you can!
Egg Sandwich
Butter each side of two slices of bread-any type you like, including an English muffin. Place in a cast iron pan or other skillet over medium heat until lightly browned. Flip and do the same on the other side. If you like, place some cheese to melt on this side of the bread. Remove from pan. Fry a large egg in a little butter and when you flip it, sprinkle with a little sea salt and pepper. You may also fry a small slice of ham with the egg for your sandwich if you like. Not a sandwich to be eaten often!
The importance of pan sizes:
You just made your favorite brownie recipe, which calls for a 9” X 9” pan. If you cook brownies that call for a 9” X 9” pan in a 9” X 13” pan, the batter will be thinly spread across the pan and the brownies will end up more like a cookie. You’ll be disappointed in the results. Pan size is a very important part of baking and cooking.
As an example of how to alter some-not all- recipes; if you are making a cake and it calls for a 11 X 4 1/2 X 2 ¾” pan, which by the below chart is 50 square inches, and you don’t have such a pan, then you can use the 8 X 1 ½ “ round pan as it is the same square inches. Cooking time might have to be adjusted, as a greater surface area would take less time to cook. Pans are measured across the top of the pan between the inside edges.
Square and rectangular pans
7 ¾ X 3 5/8 X 2 ¼”…….28 sq. inches
8 X 8 X 1 ½” ……64 sq. inches
9 X 5 X 2 ¾” ……45 square inches
9 X 9 X 1 ½” …..81 sq. inches
11 X 4 ½ X 2 ¾” …….50 sq. inches
11 X 7 X 1 ½” …..77 sq. inches
13 X 9 X 2” ….117 square inches
15 X 10 X 2”….150 sq. inches
15 ½ X 10 ½ X 1”……163 sq. inches
16 X 5 X 4 “ …..80 sq. inches
Round pans
8 X 1 ½”…….50 sq. inches
9 X 1 ½”……..64 square inches
10 X 1 ½”…….79 square inches
Another note regarding cake pans is that the type of pan it is has an effect on the end result. A glass or enamel pan or pans of a dark color will hold more heat and make for a browner crust. If you have these pans, but do not want the darker crust, you can reduce the heat by 25 degrees, but use the same baking time. If you have shiny metal pans, your crust will be thinner and less brown.
Oven temperatures:
Remember to always pre-heat your oven at least 10 minutes before baking to allow it to come up to temperature. High temperature recipes can take 20 minutes for the oven to reach the required temperature.
Very slow …250 degrees or below
Slow …300 degrees
Moderately slow….325 degrees
Moderate ….350 degrees
Moderately hot…375 degrees
Hot….400 degrees
Very hot…425 degrees or higher
Lastly, you need to know how to measure dry and liquid ingredients.
Dry ingredients:
With dry ingredients, you scoop up the flour (or whatever) and level the top of the measuring cup with a knife. Do not press ingredients down before leveling.
3 teaspoons=1 tablespoon=1/2 ounce
2 tablespoons=1/8 cup=1 ounce
4 tablespoons=1/4 cup=2 ounce
5 1/3 tablespoons=1/3 cup=2.6 ounce
8 tablespoons=1/2 cup=4 ounces
12 tablespoons=3/4 cup=6 ounces
16 tablespoons=1 cup=8 ounces
32 tablespoons=2 cups=16 ounce
Liquid Ingredients:
Place the measuring cup on a flat service to make sure the liquid is at the proper line on the measuring cup.
2 tablespoons=1 fluid ounce
¼ cup=2 fl.oz.
½ cup=4 fl.oz.
1 cup=8 fl.oz.
1 ½ cups=12 fl.oz.
2 cups or 1 pint=16 fl.oz.
4 cups or 1 quart=32 fl.oz.
1 gallon=128 fl.oz
__________________________________________________
Patty’s Brownies
No, it’s not healthy, but we don’t have them often and when we do we use organic ingredients. We’ll double this recipe and use a 9X13” pan
Preheat oven to 350 degrees
½ cup walnut oil or melted butter, cooled slightly
1 cup unrefined sugar
1 teaspoon vanilla
2 eggs
½ cup whole-wheat pastry or all-purpose flour
1/3 cup cocoa
¼ teaspoon non-aluminum baking powder
¼ teaspoon sea salt
½ cup chopped walnuts, optional
Blend oil or butter and vanilla in a mixing bowl. Add eggs and beat well.
Combine flour cocoa, baking powder and salt; gradually add to egg mixture until well blended. Stir in nuts, if desired.
Grease a 9X9” glass pan and spread in the brownie mixture. Bake for 20 to 25 minutes or until brownies start to pull away from the pan or a toothpick comes out clean. Cool in pan. Makes 16 brownies