Tips for Healthy Skin

These tips are appropriate for kids and adults, although the ‘watch your caffeine/alcohol/smoking’ tips are (hopefully) only needed by adults.. Teenagers are particularly interested in healthy, clear skin. These healthy skin tips will make body and skin healthier. Perfect!

Wintertime is notorious for leaving people with dry, chapped skin, but it doesn’t have to be that way. Here are some easy tips for healthier skin.

In the nutrition world the mantra is: if all else fails, support your liver. Your liver, like your skin, is a detoxifying organ and the average person tends to abuse the liver with too much alcohol, caffeine and toxins. So, begin your day with a glass of warm lemon water, which is alkalinizing in your body. Simply squeeze a half (or a whole) lemon into a glass of water and your liver will love you.  Before you get into the shower, exfoliate your skin. Use a soft, natural fiber brush with a long handle and brush dry skin up from your feet and down from your shoulders towards your heart. Do not brush varicose veins or damaged skin. Dry brushing not only removes dead skin, but also improves circulation, which helps to remove toxins. As toxins will be released and removed, it is important that your bowels are clear, so the toxins can be removed and not reabsorbed. If you are constipated, work on alleviating that problem.

A nice hot shower or bath feels wonderful in the winter, but is also drying for your skin. Reduce the temperature of your water and if you can stand it, finish your shower with cool water. Speaking of temperature, forced-air heat is drying as well. Reduce the heat in your home and wear extra clothing – natural fibers are best. Your skin will be thankful as will your heating bill. Pat your skin dry, and then rub lotion (no toxins in the lotion please!) all over your body. Occasionally rub your scalp and hair with olive or coconut oil and let sit for a few minutes before rinsing off. Your hair will be shiny and beautiful.

Your skin is a product of what you put in your mouth. Staying hydrated with eight glasses of pure water a day is imperative for a healthy body and skin. Alcohol, caffeine and acidifying foods are dehydrating and should be limited. Smoking is very damaging for body and skin, and should be avoided.

Free radicals are a natural part of your body’s metabolic function. Consuming processed foods, exposure to toxins, and unhealthy habits such as smoking, causes free radicals to increase to dangerous levels damaging our body and skin. Antioxidants are free-radical scavengers and help protect the body from damage. The best way to ensure adequate intake of antioxidants is through a balanced diet consisting of 5-9 servings of vegetables and fruit per day.

Essential fatty acids are responsible for healthy cell membranes, and protect us from the same inflammatory process that can harm our arteries and cause heart disease.  The best-known essential fatty acids are omega 6 and omega 3, which must be in balance for good health and good skin.  A 1:1 ratio is optimum, but 4:1 is acceptable. Unfortunately most Americans are woefully shy of Omega 3 fatty acids that are found in cold-water fish such as salmon, walnuts, flax seeds and oil.

When oil is commercially processed, high temperatures are used and unhealthy solvents and deodorizers are added to the oil. There is basically no nutritive value and they can actually be damaging to your body and therefore your skin. Use those labeled cold pressed, expeller processed, or extra virgin.  Since any fat, even a healthy one, is high in calories, we don’t need more than about two tablespoons a day.

When you consume a balanced diet full of health-supporting vegetables combined with dry brushing, cooler water, and natural lotion, your skin will look and feel much softer and healthier throughout the winter and the rest of the seasons.

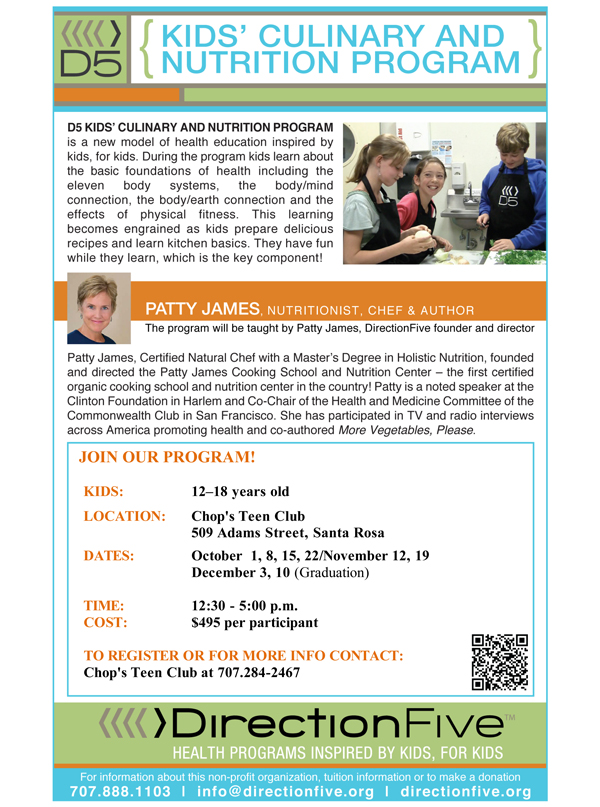
D5_programflyer---Chop's,-8-x11--1-up,-9-13-11 imgres

Give More Thought to Snacks

Give More Thought to Snacks

by Patty James

According to a recent survey of American’s dietary habits 75% of us eat breakfast, 88% eat lunch, and 90% of us snack daily, yet we don’t plan snacks like we do other meals.

Eating candy, chips, donuts, cookies, and other unhealthy snacks will satisfy your cravings temporarily, but they cause your blood sugar to rise and just as quickly drop, making you feel lethargic, moody, and still hungry because you haven’t given your body the fuel it needs. For those with children, studies have shown that up to 45% of the average American child’s caloric intake comes from snacks. Therefore, planning ahead for snacks is as important as the meals you plan for you and your family.

If you think about your daily snacks as another meal, then that meal should supplement breakfast, lunch, and dinner. Let’s say you serve oatmeal for breakfast, a turkey sandwich for lunch, and salmon with brown rice and steamed broccoli for dinner. Complementary snacks might be fruit or some raw veggies, since those don’t make an appearance in the three main meals.

If you have children, does your child attend day care or an after school program? Do you know what snacks are being served? Find out! If you feel that the snacks your child receives there aren’t healthy, put together your own snack bags for your child to bring with them.

Here are some snacking tips:

  • Snack first before chores, homework, or other activities. When you eat while doing other things, such as watching TV, you tend to overeat because you aren’t paying attention to your intake. An after-school snack-time is a great way to take a break and re-connect with kids who’ve been away at school all day.
  • If you have it on hand, you will eat it! That is, if you’re trying to avoid processed snack foods, don’t buy them. Stock up on snacks that make you feel good like fruit, vegetables, nuts, seeds, and whole grains.
  • Snacks are fuel for the body, just like meals. Aim for a balance of protein, fat and carbohydrates in your snacks just like you would with a regular meal. Hummus and sliced vegetables, for instance, contain all 3 macronutrients: proteins, carbohydrates, and good fats.
  • Take note of what time of day you tend to snack. For many adults (and kids), it’s late afternoon. Anticipate your hunger and arm yourself with healthy snacks instead of scrambling and settling for something sugary.
  • Be aware of what you drink. A sugary drink or a high-sugar and fat coffee drink is not a healthy snack. It won’t fill you up – the most it will do is cause a blood sugar spike.
  • Pay attention to portions. According to Dr. Brian Wansink, director of Cornell’s Food and Brand Lab, people make over 200 food decisions a day. Some decisions are subtle, like choosing plate size, which influences how much we eat at that meal. It is just as important to be mindful of snack portions. However, if you’re eating fresh fruits and vegetables, you don’t really even need to measure! (French fries EXCLUDED.)

Examples of Healthy Snacks:

  • Half an apple with 2 teaspoons of peanut or almond butter
  • An orange and a few raw almonds or walnuts
  • 1/3 cup of unsweetened applesauce with 1 slice of whole-grain toast, cut into 4 strips for dunking
  • Popcorn, seasoned with herbs, garlic, nutritional yeast and a bit of olive oil.
  • Plain yogurt with berries
  • A small tossed salad with lettuce, tomato, cucumber, or whatever is in season, tossed with lemon juice or balsamic vinegar and flax or olive oil.
  • Hummus or bean dip and veggies, or baked whole-wheat pita bread or whole grain crackers.
  • Sushi made with brown rice and sliced vegetables (cucumbers, carrots, green onion, red pepper, avocado, etc)

Happy snacking!


The Socratic Method

At DirectionFive, we teach kids using the interactive Socratic method. Here is a summary for you. We hope it’s useful.

In his lecture, Political Science professor Rob Reich describes the Socratic method, pointing out the following:


  • Socratic inquiry is not “teaching” per se. It does not include PowerPoint driven lectures, detailed lesson plans or rote memorization. The teacher is neither “the sage on the stage” nor “the guide on the side.” The students are not passive recipients of knowledge.


  • The Socratic Method involves a shared dialogue between teacher and students. The teacher leads by posing thought-provoking questions. Students actively engage by asking questions of their own. The discussion goes back and forth.


  • The Socratic Method says Reich, “is better used to demonstrate complexity, difficulty, and uncertainty than to elicit facts about the world.” The aim of the questioning is to probe the underlying beliefs upon which each participant’s statements, arguments and assumptions are built.


  • The classroom environment is characterized by “productive discomfort,” not intimidation. The Socratic professor does not have all the answers and is not merely “testing” the students. The questioning proceeds open-ended with no pre-determined goal.


  • The focus is not on the participants’ statements but on the value system that underpins their beliefs, actions, and decisions. For this reason, any successful challenge to this system comes with high stakes—one might have to examine and change one’s life, but, Socrates is famous for saying, “the unexamined life is not worth living.”


  • “The Socratic professor,” Reich states, “is not the opponent in an argument, nor someone who always plays devil’s advocate, saying essentially: ‘If you affirm it, I deny it. If you deny it, I affirm it.’ This happens sometimes, but not as a matter of pedagogical principle.”


Both critical thinking and Socratic questioning share a common end. Critical thinking provides the conceptual tools for understanding how the mind functions in its pursuit of meaning and truth and Socratic questioning employs tools to frame questions in the pursuit of meaning and truth.


Tips. Recipes. Anatomy/Digestive Lesson

Whether you’re a teacher to other people’s kids, or you want ideas for your own, here are some ideas for you.

Introduction:

Healthy Kitchens, Healthy Lives is the mantra for this program.

When you understand the foods that support your health, and then you learn to create sumptuous meals for you and the people in your life, you feel satisfied and contented.

In the Kitchen:

Kids, like most adults, simply want to jump in and make homemade pizza, but there are basics that need to be learned first, for safety and sanitation reasons, of course, but also so one knows how to measure properly, what size and type of pan to use and other basic information needed for a successful kitchen experience.

Safety and Sanitation:

Before you enter the kitchen, tie your hair back if you have long hair, and if you’re sick, stay out of the kitchen altogether. Next wash your hands in warm, soapy water. If you have any cuts or sores, be sure to cover with a bandage. While you’re in the kitchen, if you sneeze, cough, touch your hair, nose or any other body part, or eat, please wash your hands again. You obviously wash your hands well after you use the restroom. If you handle raw meat or fish, please wash your hands before touching any other food. Ideally your clothes and aprons should be clean.

Here are some very important tips to always keep in mind when you’re in the kitchen:

When you work with food, keep raw foods away from cooked foods.

Keep food away from cleaning products.

Wash all raw fruits and vegetables before preparation.

Rinse off your meats and fish as well, pat dry and leave in the refrigerator until you’re ready to use them. Raw and thawing meats and fish should always be kept on the bottom shelf of the refrigerator to avoid dripping and contamination.

Do not thaw foods at room temperature; thaw in a proper container in the refrigerator. Do not refreeze food after it’s been thawed.

Food needs to be held at proper temperatures to avoid the growth of bacteria that can make you sick. Cold foods should be kept at 40 degrees Fahrenheit.  Stuffed meat and reheated leftovers should be kept at 165 degrees, beef and other hot food, 140 degrees, fish and poultry, 145 degrees and cooked pork, hamburgers and eggs, 155 degrees.

Kitchens can be dangerous places, with sharp equipment and hot stoves! It was my experience when I had my cooking school that, in order of accidents, potato peelers, graters, knives, and hot stoves and ovens, were the major culprits. With some very basic and very important rules, well learned, accidents rarely happen.

A tip for adults working with kids in the kitchen is to try not to hover. I understand the nervousness about watching an eight-year hold with a knife, but hovering only makes them nervous and makes the kitchen a stressful place, when it should be a warm, nurturing place. When they understand basic kitchen safety and the proper use of equipment such as knives, they’ll be fine.

The importance of pan sizes:

You just made your favorite brownie recipe, which calls for a 9” X 9” pan. If you cook brownies that call for a 9” X 9” pan in a 9” X 13” pan, the batter will be thinly spread across the pan and the brownies will end up more like a cookie. You’ll be disappointed in the results. Pan size is a very important part of baking and cooking.

As an example of how to alter some-not all- recipes; if you are making a cake and it calls for a 11 X 4 1/2 X 2 ¾” pan, which by the below chart is 50 square inches, and you don’t have such a pan, then you can use the 8 X 1 ½ “ round pan as it is the same square inches. Cooking time might have to be adjusted, as a greater surface area would take less time to cook. Pans are measured across the top of the pan between the inside edges.

Square and rectangular pans

7 ¾ X 3 5/8 X 2 ¼”…….28 sq. inches

8 X 8 X 1 ½” ……64 sq. inches

9 X 5 X 2 ¾” ……45 square inches

9 X 9 X 1 ½” …..81 sq. inches

11 X 4 ½ X 2 ¾” …….50 sq. inches

11 X 7 X 1 ½” …..77 sq. inches

13 X 9 X 2” ….117 square inches

15 X 10 X 2”….150 sq. inches

15 ½ X 10 ½ X 1”……163 sq. inches

16 X 5 X 4 “ …..80 sq. inches

Round pans

8 X 1 ½”…….50 sq. inches

9 X 1 ½”……..64 square inches

10 X 1 ½”…….79 square inches

Another note regarding cake pans is that the type of pan it is has an effect on the end result. A glass or enamel pan or pans of a dark color will hold more heat and make for a browner crust. If you have these pans, but do not want the darker crust, you can reduce the heat by 25 degrees, but use the same baking time. If you have shiny metal pans, your crust will be thinner and less brown.

Oven temperatures:

Remember to always pre-heat your oven at least 10 minutes before baking to allow it to come up to temperature.  High temperature recipes can take 20 minutes for the oven to reach the required temperature.

Very slow …250 degrees or below

Slow …300 degrees

Moderately slow….325 degrees

Moderate ….350 degrees

Moderately hot…375 degrees

Hot….400 degrees

Very hot…425 degrees or higher

Lastly, you need to know how to measure dry and liquid ingredients.

Dry ingredients:

With dry ingredients, you scoop up the flour (or whatever) and level the top of the measuring cup with a knife. Do not press ingredients down before leveling.

3 teaspoons=1 tablespoon=1/2 ounce

2 tablespoons=1/8 cup=1 ounce

4 tablespoons=1/4 cup=2 ounce

5 1/3 tablespoons=1/3 cup=2.6 ounce

8 tablespoons=1/2 cup=4 ounces

12 tablespoons=3/4 cup=6 ounces

16 tablespoons=1 cup=8 ounces

32 tablespoons=2 cups=16 ounce

Liquid Ingredients:

Place the measuring cup on a flat service to make sure the liquid is at the proper line on the measuring cup.

2 tablespoons=1 fluid ounce

¼ cup=2 fl.oz.

½ cup=4 fl.oz.

1 cup=8 fl.oz.

1 ½ cups=12 fl.oz.

2 cups or 1 pint=16 fl.oz.

4 cups or 1 quart=32 fl.oz.

1 gallon=128 fl.oz

Ready to begin!

You are almost ready to begin, but before you do so, read the recipe completely to make sure you have all the ingredients. Next mise en place your ingredients, get out all necessary equipment and you’re ready!

Recipe Tips:

  • Read through the recipe carefully to make sure that you understand the ingredients and directions. Make sure all ingredients meet your dietary needs.
  • Make sure that you can perform all the techniques.
  • Look at the recipe yield and decide if the number of servings is what you need. Check that you have all the necessary equipment and ingredients.
  • Make sure that you have adequate time to prepare and cook, if needed, the recipe.
  • Check whether you can (or need to) make any part of the recipe ahead of time.
  • Check whether an ingredient is divided, so that you don’t make the mistake of using that ingredient all at once.
  • Find out whether you need to preheat the oven.

Recipe grammar is important! One cup chopped nuts is not the same as 1 cup nuts, chopped.  Sometimes you measure an ingredient and then prepare it and sometimes you prepare the ingredient and then measure it.

Ghee or Clarified Butter

We’ll use this for various recipes this week.

Take 1 pound of organic, unsalted butter and melt in over medium-low. Skim the white foam off the top. Let simmer over low heat until the milk solids on the bottom have turned a light brown; about 15 minutes. Filter though a coffee filter or cheesecloth into a jar. Ghee does not burn like butter. It’s often used in Indian cooking. This will keep for approximately 1 month.


A Tip for ‘quick breads’:

Carbon dioxide is necessary for leavening, or causing tiny air pockets in, the pancakes or muffins. Excessive blending of the batter causes early formation and escape of carbon dioxide gas. Over-mixing can overdevelop the gluten (a protein) in the flour. While some of this protein is necessary for the normal texture of pancakes, too much gluten can produce tough, chewy pancakes and muffins. For best results, stop mixing the batter before all the tiny clumps of flour are gone.

Oat Bran Muffins

Serves 12

2 cups oat bran (not oatmeal)

1/2 cup sugar*

2 teaspoons baking powder

1 teaspoon cinnamon

1/2 teaspoon sea salt

1 cup milk or other liquid. I used Chai once.

3/4 cup applesauce or pumpkin puree or prune puree

2 eggs

1 cup apple, grated

1/4 cup pumpkin seeds, chopped

1/3 cup almonds, chopped

1/4 cup raisins

Preheat oven to 425 degrees and lightly oil the muffin pan or use paper muffin cups.

Mix together first 5 ingredients. In a small bowl mix together the milk, applesauce and egg; stir well and add the grated apple. Stir briefly into the dry ingredients with the pumpkin seeds, almonds and raisins.

Spoon into prepared muffin pan and bake for 15-17 minutes.

Notes:

* Use non-refined sugar such as Sucanat or Rapadura

You may use walnuts instead of almonds and dried apricots, cranberries or cherries instead of raisins. I have also added 1 tablespoon of sesame seeds and 1 tablespoon of chopped sunflower seeds.

A bite of food and you:

Where does digestion begin? Let’s use a slice of pizza as an example. Digestion begins in the brain when you first notice that beautiful crust topped with all your favorites—sight, perhaps sound and most acutely smell all kick in to begin the digestion process of that first bite.

Is your mouth watering? It’s supposed to! The salivary glands in your mouth produce saliva that contains an enzyme, salivary amylase, which moistens the food and begins the chemical digestion of carbohydrates.

Next your teeth chew the food, hopefully very well, as that affects digestion and nutrient absorption. So far you have been in control, you voluntarily bit into that slice of pizza and also chose to chew well. That chewed piece of food you’re about to swallow is now called a bolus. After you’ve swallowed the bite, everything else is involuntary.

Swallowed food is pushed first into the pharynx, a tube-like structure behind the nasal cavities and the mouth. Air must pass through the pharynx on the way to the lungs and food on the way to the stomach. Next, that masticated (chewed) bite of pizza passes into the esophagus, which connects the throat above with the stomach below. At the junction of the esophagus and stomach, there is a ring-like muscle, called the lower esophageal sphincter that closes the passage between the two organs. As food approaches the closed sphincter, the sphincter relaxes and allows the food to pass through to the stomach.

Next is the stomach, a muscular bag, with three main parts. The top is called the fundus. The middle is called the body of the stomach. The bottom is called the antrum or pylorus.

The lining of the stomach contains glands, which make and secrete stomach juices. The stomach juices contain an acid and a digestive enzyme called pepsin. These began to flow as soon as you saw and smelled that slice of pizza, well before food entered your stomach. The enzyme starts to break down (digest) proteins in the food so that the body can absorb them. The acid is needed for the enzyme to work properly. It also helps to kill bacteria that might be in the food, protecting against food poisoning. Stomach acids sterilize your food.

That bite of pizza you took looks nothing like a bite of pizza anymore, especially after it hits the stomach and stomach acids. First the muscle of the upper part of the stomach relaxes to accept the swallowed material. Next the muscles of the stomach wall begin powerful contractions, which pass over the stomach in waves. This movement of organ walls, which propels food and liquid through the system from one organ to the next, is called peristalsis. These muscle contractions mix up the food, liquid and digestive juices and break it down until it is a thick liquid. The third task of the stomach is to empty its contents slowly into the small intestine.

Some foods stay in the stomach longer than others. Carbohydrates spend the least amount of time in the stomach, while protein stays in the stomach longer, and fats the longest.

The stomach makes another chemical (the intrinsic factor) that is needed for the body to absorb a vitamin called vitamin B12. This vitamin is needed by the body to help make red blood cells and to helps to maintain a healthy nervous system.

So why doesn’t our stomach eat itself with all these acids? There are other glands in the stomach lining that make thick mucus. This mucus helps to protect the stomach lining from being damaged by the acid and protein-digesting enzyme in the stomach juices.

After the stomach empties the food and juice mixture into the first part of the small intestines, the duodenum, the juices of two other digestive organs mix with the food that is now called chyme. One of these organs is the liver, which produces bile, a digestive juice. Bile is stored in the gallbladder. It is squeezed out of the gallbladder, through the bile ducts, and into the intestine to mix with the fat in food. The bile acids dissolve fat into the contents of the intestine. The other organ is the pancreas, which produces pancreatic enzymes that break down the carbohydrate, fat, and protein in food.

The next small intestine section is the jejunum, followed by the ileum, which leads to the large intestine. These two sections absorb nutrients and water more than they break down food. The intestinal wall contains blood vessels that carry the absorbed nutrients to the liver through the portal vein. The intestinal wall also releases water and mucus, which lubricates the intestinal contents, which dissolves the digested fragments. Small amounts of enzymes that digest proteins, sugars, and fats are also released. The mucosa of the small intestine contains many folds that are covered with tiny fingerlike projections called villi. In turn, the villi are covered with microscopic projections called microvilli. These structures create a vast surface area through which nutrients can be absorbed.

Once all the nutrients are taken from the food, the indigestible parts are transported to the large intestines. Like the small intestines, the large intestines have three parts. The first is called the cecum. Next comes the colon, which has three sections: ascending, transverse and descending. In the first two sections, salts and fluids are absorbed from the indigestible food. Billions of bacteria that live in the colon help to ferment and absorb substances like fiber. The products of this process include cells that have been shed from the mucosa and undigested parts of the food, known as fiber.  While these tracts absorb, they also produce mucus that helps feces move easily through the descending colon and into the third part of the large intestine: the rectum. Your feces or stool is approximately thirty percent bacteria, thirty percent indigestible matter like fiber, and forty percent inorganic waste like chemicals from processed foods and bodily waste like old red blood cells. Lastly, feces is excreted through your anus in your bowel movement, triggered by nerves that tell you it’s time to go!

That’s it! Your digestive system, like the rest of your body, is truly amazing.

Digestive System


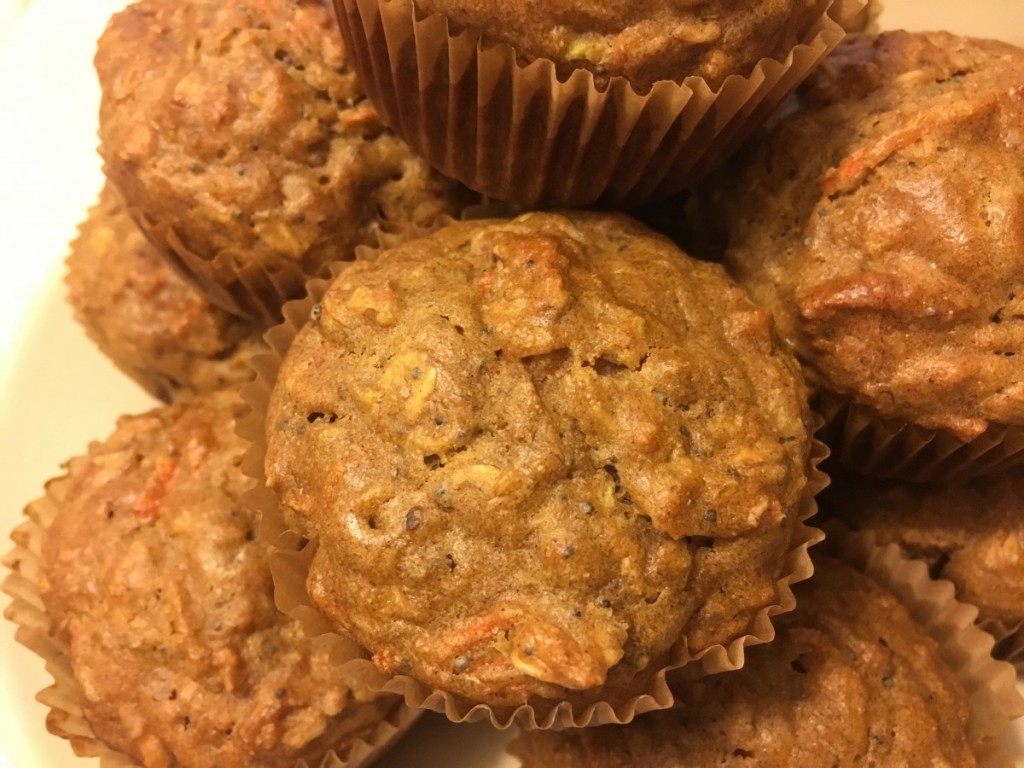
Carrot Apple Walnut Muffins

Carrot Apple Walnut Muffins

No sugar and non-gluten

These muffins contain stevia, which is the dried powder of the Stevia plant. Be careful to purchase Stevia without artificial sweeteners.

Preheat oven to 375 degrees

Makes 12 muffins

2 eggs

¼ cup olive or coconut oil

1/3 cup mashed banana

1/8 cup dried stevia See Note: *

1 medium apple, grated

1 cup grated carrot

½ cup milk-dairy or non-dairy, unsweetened

2 teaspoons vanilla

1 tablespoon fresh lemon juice

2/3 cup old fashioned oats- See Note*

1 cup plus 2 tablespoons flour- See Note*

½ teaspoon sea salt

1 ½ teaspoons baking soda

2 teaspoons cinnamon

½ teaspoon ground ginger

1/3 cup chopped raw walnuts

1 tablespoon poppy seeds


In a large bowl, place the eggs and whisk slightly. Add the mashed banana, stevia, apple, carrot, milk and vanilla and mix well. Next stir in the oats and let sit for 2 minutes. Combine the flour, baking soda and spices and add to the bowl, stirring briefly. Lastly stir in the walnuts and poppy seeds.

Place in well-greased (use olive oil or coconut oil) muffin tins or use muffin tin liner. Even with liners, I recommend greasing the bottom slightly as non-gluten flour seems to stick a bit more than other types of flour. Bake in preheated 375 oven for 25 to 30 minutes or until toothpick comes out clean. Let cool before trying to remove paper liners.

*Note: Use non-gluten oats if you are making this as a non-gluten recipe. Use non-gluten flour mix or flour made from the ancient wheat, Einkorn. To make this a vegan recipe, use egg substitute and nut milk. If you don’t want to use Stevia, use ¼ cup non-refined sugar such as Sucanat or coconut sugar.

Creativity: Feel free to change spices. Chinese 5-Spice is a nice choice. Perhaps add nutmeg or cardamom. You could use raw almonds instead of walnuts and use almond extract instead of vanilla.

IMG_8494

Homemade Pasta

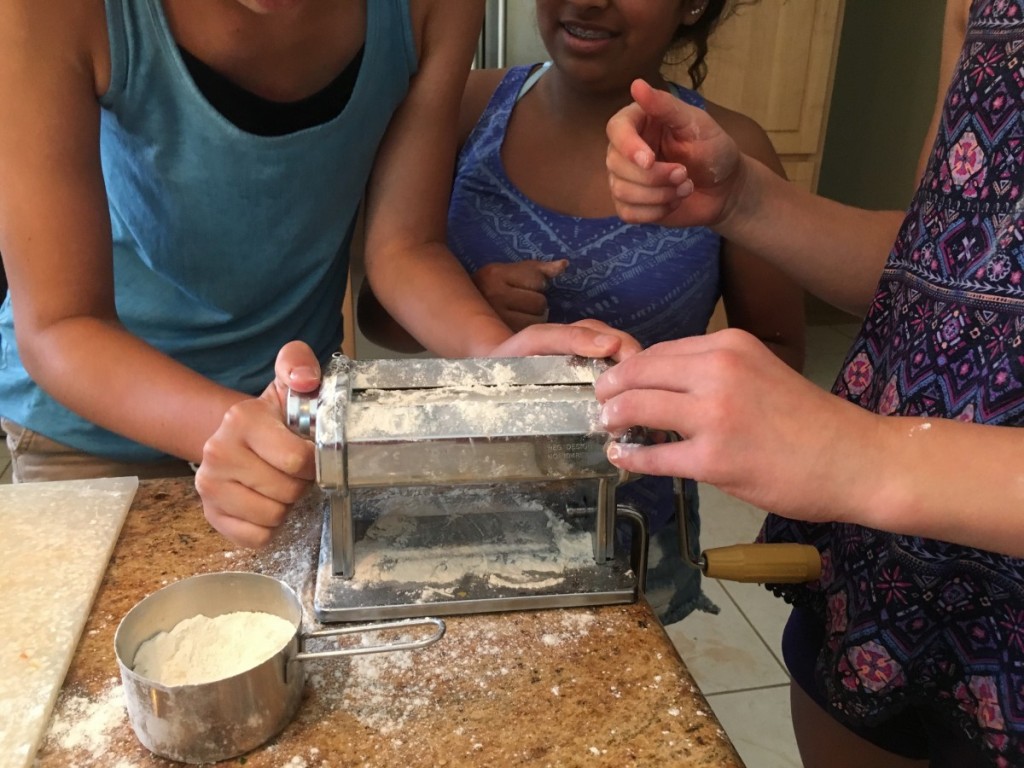
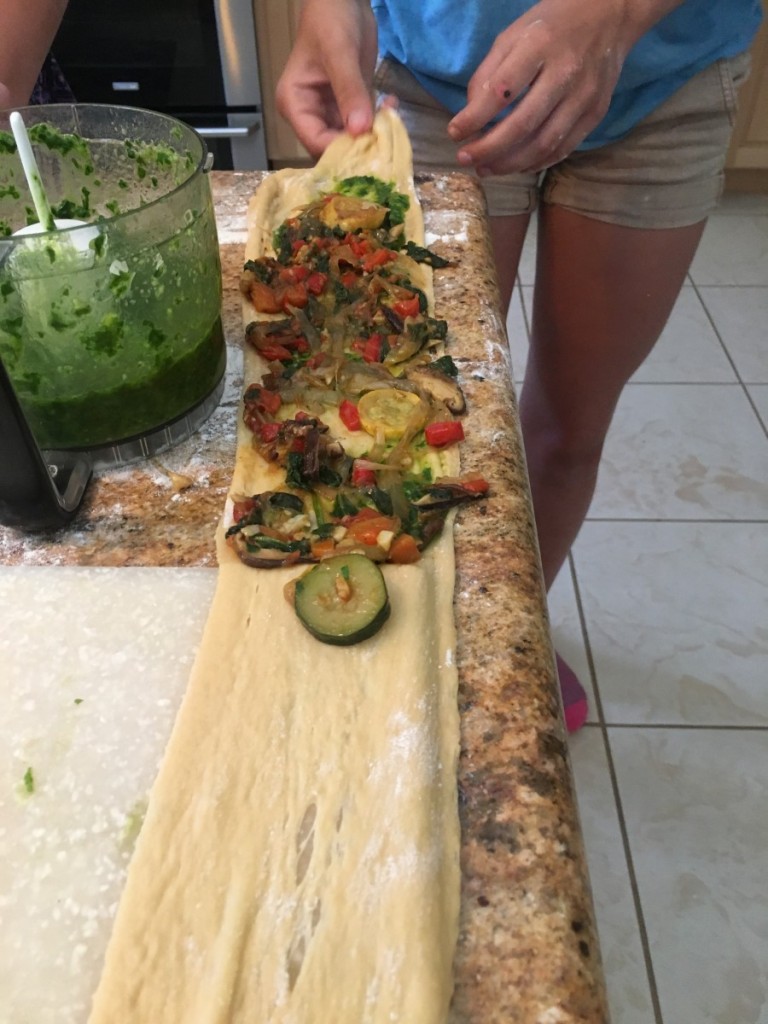
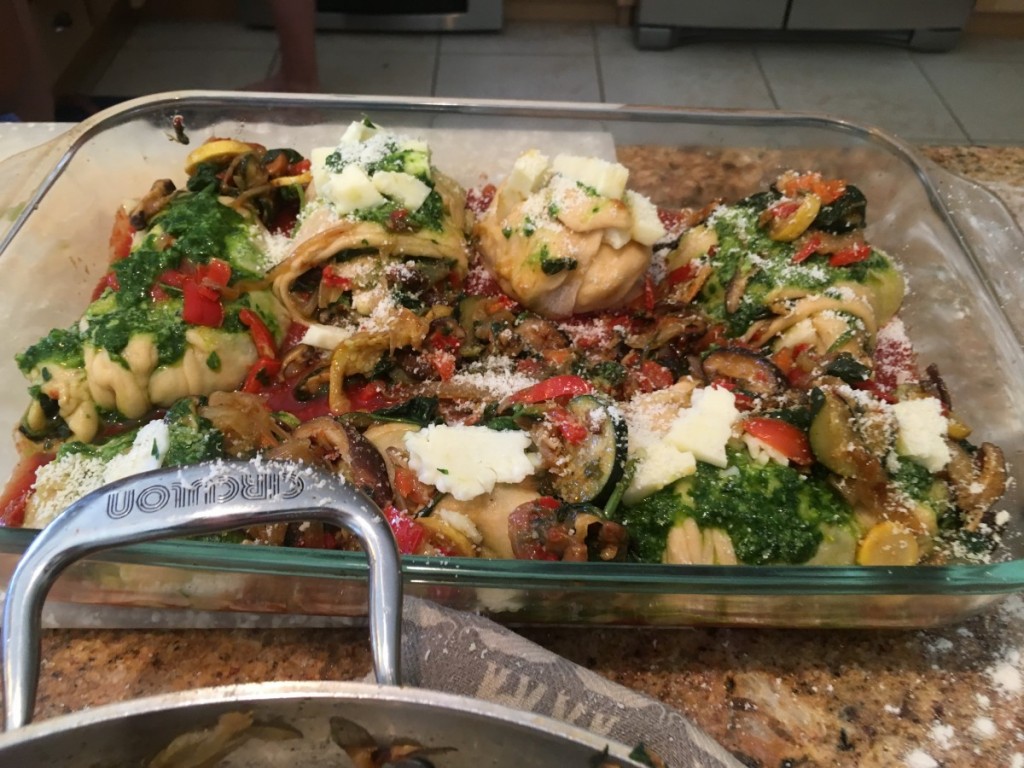
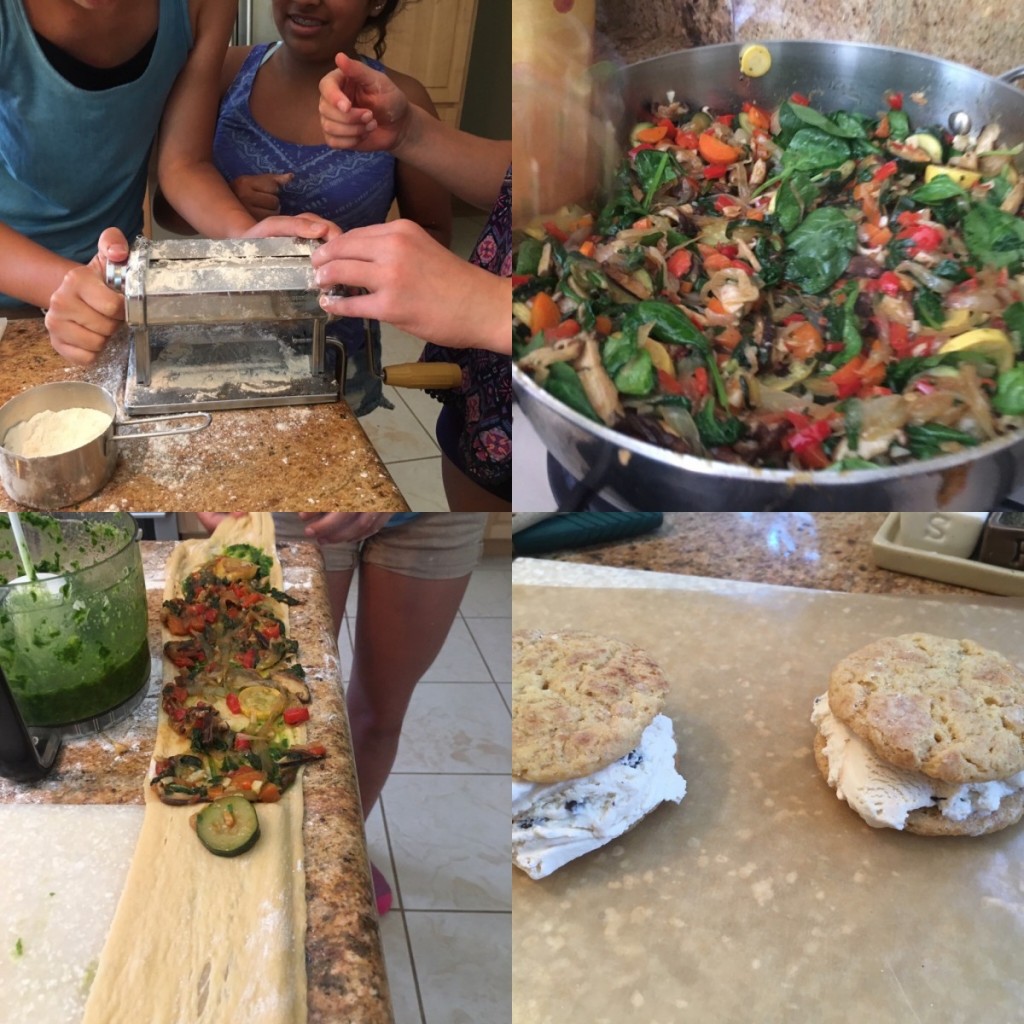
It’s so much fun teaching a bunch of thirteen year-old girls at a birthday party! The request by the birthday girl was to learn to make homemade pasta, and ice cream sandwiches.

The birthday girl didn’t consume dairy as she was aware that dairy made her allergies worse. Pretty great that she was able to listen to her body and figure out this connection.

Fresh Pasta

By Patty James
Makes about 1 pound.

3 cups unbleached or whole-wheat pastry flour plus additional for dusting
4 large eggs, lightly beaten
1 teaspoon sea salt
2 to 3 tablespoons water

Special equipment: a pasta machine (or you may roll out by hand on a lightly floured board)

To make dough in a processor:
Blend flour, eggs, salt, and 2 tablespoons water in a food processor until mixture just begins to form a ball, adding more water, drop by drop, if dough is too dry (dough should be firm and not sticky). Process dough for 15 seconds more to knead it. Transfer to a floured surface and let stand, covered with an inverted bowl, 1 hour to let the gluten relax and make rolling easier.

To make dough by hand:
Mound flour on a work surface, preferably wooden, and make a well in center. Add eggs, salt, and 2 tablespoons water to well. With a fork, gently beat eggs and water until combined. Gradually stir in enough flour to form a paste, pulling in flour closest to egg mixture and being careful not to make an opening in outer wall of well. Knead remaining flour into mixture with your hands to form a dough, adding more water drop by drop if dough is too dry (dough should be firm and not sticky). Knead dough until smooth and elastic, 8 to 10 minutes. Cover with an inverted bowl and let stand 1 hour to let the gluten relax and make rolling easier.

Roll pasta:
Divide dough into 8 pieces, then flatten each piece into a rough rectangle and cover rectangles with an inverted large bowl. Set rollers of pasta machine on widest setting.

Lightly dust 1 rectangle with flour and feed through rollers. (Keep remaining rectangles under bowl.) Fold rectangle in half and feed it, folded end first, through rollers 7 or 8 more times, folding it in half each time and feeding folded end through. Dust with flour if necessary to prevent sticking. Turn dial to next (narrower) setting and feed dough through rollers without folding. Continue to feed dough through rollers once at each setting, without folding, until you reach narrowest setting. Dough will be a smooth sheet (about 36 inches long and 4 inches wide). Cut sheet crosswise in half. Lay sheets of dough on lightly floured baking sheets to dry until leathery but still pliable, about 15 minutes. (Alternatively, lightly dust pasta sheets with flour and hang over the backs of straight-backed chairs to dry.) Roll out remaining pieces of dough in same manner.

• Dough can be made (but not rolled out) 4 hours ahead and chilled, tightly wrapped in plastic wrap. • Fresh-cut pasta sheets can be chilled in large sealed plastic bags up to 12 hours.

Snickerdoodle Cookies

We made ice cream sandwiches using this recipe with the butter substitute since the birthday girl couldn’t have dairy. After the cookies were cooled, we used coconut milk ice cream. They were a big hit!

  • 1 1/2 cups non-refined sugar
  • 1 cup butter or butter substitute (non-hydrogenated)
  • 2 eggs
  • 1 teaspoon vanilla
  • 2 3/4 cups unbleached all-purpose or whole-wheat pastry flour
  • 2 teaspoons cream of tartar
  • 1 teaspoon baking soda
  • 1/2 teaspoon sea salt
  • 2 tablespoons non-refined sugar
  • 2 teaspoons cinnamon

Preheat oven to 375F.

Mix 1 1/2 c. sugar, butter, eggs and vanilla. Stir in flour, cream of tartar, and soda. Chill dough. Roll dough into balls the size of walnuts. Combine the remaining 2 tablespoons sugar and cinnamon. Roll cookies in this mixture and bake for 8-10 minutes. Cool completely on wire racks.

Note: If you use a butter substitute such as EarthBalance the cooking time is increased to about 15 minutes.


IMG_8424 IMG_8422 IMG_8426 IMG_8432 MTMI4821

Bone Health

Bone Health for Kids:

When I traveled the country interviewing kids, I was often asked to teach a class after I was finished the interviews. I was more than happy to of course! I chose bone health as the topic as it is a good segue into the dangers of soda and I found that kids correlated good health with strong bones. The below is really more of a checklist than an article.

Here are some basic facts about bone health for kids.  Use this checklist when teaching groups of kids or your own children. Involve them by asking the questions and waiting for the answers. It’s really fun!

How many bones in an adult human body?

206. There are more in a kid’s body, as some bones haven’t fused together.        More than half of our bones are in the hands and feet!

 Does a human or a giraffe have more bones in their neck?

They’re the same!

Peak ages for bone density and growth is 9-12 years of age.  By age 17, 90% of bone mass is established.

Think of bones like a bank account: You put in calcium until you reach the age of 18, then the bank is closed and you can only withdraw.  This is an important visual for the kids.

Sources of calcium:

Dark, leafy greens such as collard greens and kale, spinach, chard, bok choy.

Broccoli

Calcium-fortified orange juice

Tofu

Almonds

Some cereals

Sardines

Dairy: Yogurt, cheddar cheese, milk

White beans

Pinto beans

How much calcium do you need a day as kids? That depends on age. The below are the upper intake level.

Infants 0-6 months 1,000 mg/day

Infants 6-12 months 1,500 mg/day

Children 1-8 years 2,500 mg/day

Children 9-18 years 3,000 mg/day

Adults 19-50 years 2,500 mg/day

What else is good for bone health?

Exercise! Weight-bearing exercise is particularly good for bones. This can be from light weight lifting or by using their own weight for weight bearing exercise; such as you do with pushups.

Osteoporosis means porous bones. Ask the kids if they know what this word means. Explain that porous bones are weak bones. Go to Google and type in Osteoporosis, and then click on images. Scary stuff.

What is not good for bone health?

Phosphoric Acid, found in sodas. It interferes with calcium absorption.

Caffeine also interferes with calcium absorption.

Kids like this next one and I am always surprised at how many kids know the meaning of the word. Ask them, do you know what ‘Euphemism’ means? Definition: The act or an example of substituting a mild, indirect, or vague term for one considered harsh, blunt, or offensive. Here is a real life example of a euphemism; ‘Energy’ drinks.

‘Energy drinks’ only give you short-term energy while doing a lot of damage to your good health.

Kids want strong bones and once they know the facts; they are more likely to lessen their soda and caffeine intake and increase bone-health foods.

Have fun with this and report back with your successes and comments.

Note: The above is very basic. With future posts I’ll give more detailed information and will include facts about vitamin D and bone health, and many other factors to help develop strong bones and ways to keep bones strong.


Beth Greer and a Healthy Home

Three programs on children’s health in a row with three incredible women leading the charge.

How to Have a Holistic, Healthy, Happy Home: Solutions for Parents of Kids with Challenges

Jun 23 2016 – 12:00pm Beth Greer, Award-winning Journalist; Environmental Health Advocate; Holistic Lifestyle Educator; Author, Super Natural Home: Improve Your Health, Home and Planet … One Room at a Time

Beth Greer, known as the Super Natural Mom, bestselling author, holistic health coach and one of the foremost experts on sustainable and toxin-free living will give a talk on things you need to know to help kids who have challenges. She will offer powerful information on the toxins in everyday products that can have triggering reactions in a child’s nervous system; five things in the home to avoid to create a safe, healthy, toxin-free home; practical and convenient solutions that give dramatic results; and symptoms to look for in kids that indicate they’re being impacted by toxins in their home environment.

She’ll also discuss a non-psychological approach to behavioral changes in kids. Don’t miss this talk to help you enhance your child’s well-being as well as your own (caregiving can be stressful).

Location: 555 Post St., San FranciscoTime: 11:30 a.m. check-in, noon program, 1 p.m. book signingCost: $20 nonmembers, $8 members, $7 students (with valid ID)MLF: Health & Medicine Program Organizer: Patty James

https://www.commonwealthclub.org/events/2016-06-23/how-have-holistic-healthy-happy-home-solutions-parents-kids-challenges

Wellness in the Schools

If you’re on this site, then you’re interested in kid’s health!

Nancy E. Easton, Co-Founder/Executive Director, Wellness in the Schools is coming to The Commonwealth Club in June to discuss healthy lunches, and much more, in our nation’s schools. If you’re an educator, parent, or anyone interested in our kid’s health, join me!

Wellness in the Schools inspires healthy eating, environmental awareness and fitness as a way of life for kids in public schools. Through meaningful public/private partnerships with school leadership, teachers, chefs, coaches, parents and kids, WITS develops and implements programs that provide healthy foods, healthy environments and opportunities for regular play to help kids learn and grow. Today WITS programs serve approximately 30,000 public school children across New York City, Kentucky, and Florida.

In an effort to combat childhood obesity and create healthier learning environments, Wellness in the Schools (WITS) developed Cook for Kids and Coach for Kids, hands-on food and fitness programs that are poised for replication nationwide. Cook for Kids has even received national accolades from First Lady Michelle Obama, and the WITS model served as inspiration for the Chefs Move to Schools Initiative.

Location: Club Headquarters, 555 Post St., San Francisco
Time: 11:30 a.m. check-in, noon program
Cost: $20 nonmembers, $8 members, $7 students (with valid ID)
MLF: Health & Medicine
Program Organizer: Patty James

https://www.commonwealthclub.org/…/2016-06…/wellness-schools

No Kid Hungry!

If you’re an educator, of simply someone who can’t bear the thought of a hungry child, please join me to hear Debbie Shore, co-founder of Share Our Strength/No Kid Hungry at The Commonwealth Club in San Francisco on June 21st.

Tue, Jun 21 2016 – 12:00pm

Debbie Shore, Co-Founder, Share our Strength

Childhood hunger is a problem that threatens an entire generation of future leaders, innovators and problem-solvers. Share Our Strength’s primary mission is “to end hunger and poverty in the United States and abroad by mobilizing industries and individuals, and creating community wealth to promote lasting change.

Educators, parents, and anyone involved with kids and interested in eliminating hunger can attend and come away with ideas and direction about what to do to help end childhood hunger.

Location: Club Headquarters, 555 Post St., San Francisco
Time: 11:30 a.m. check-in, noon program
Cost: $20 nonmembers, $8 members, $7 students (with valid ID)
MLF: Health & Medicine
Program Organizer: Patty James


https://www.commonwealthclub.org/events/2016-06-21/end-childhood-hunger-what-you-can-do-help